
1. BEFORE YOU TAKE OFF
When you first visit a gliding site or when you take your first flight, you will be looked after by your instructor and fellow club members. No prior knowledge is needed. This is all part of the wonderful, cooperative world of gliding. By the time you get your licence (or equivalent) you will need the information in this chapter to look after other pilots and the next nervous visitor. Your training will progressively introduce these various elements. This section includes vital airfield safety information, advice for looking after the people involved in gliding (like you), some of the things that need doing, descriptions of equipment and some basic meteorology (glider pilots like to know a lot about the weather).

- Look in all directions before moving around the airfield;
- Always walk/stay behind an aircraft ready to launch;
- Stay away from winch cables;
- Speakup! If you see something that seems wrong or unusual, say or do something.
LOOK IN ALL DIRECTIONS
Most people will have been a passenger in a car many times before they learn to drive. The world of gliding is no more complicated, but it is different; most of us didn’t grow up around gliders and airfields. When you’re on an airfield, get used to having a good look around before you move around. Especially while crossing take-off and landing areas, you need to be 100% sure that no aircraft is about to take off or land. Gliders fly almost silently (of course) and generally have the same colour as the sky. Once approaching to land, a glider pilot has few options for avoiding pedestrians. Checking all directions will be the most important skill you need to develop. Mobile phones can distract you from carefully looking out – only use them with the utmost care.

DEPARTING GLIDERS
Never cross in front of a glider that is ready, or nearly ready to launch. When someone is hooking up the winch cable or tow-rope: stay behind the glider. This also applies if you just want to watch a glider launch – do this from behind the aircraft and not diagonally in front of it.
BEWARE OF PROPELLORS
Gliding clubs have a variety of powered aircraft: be very wary of propellors. Do not walk anywhere near them when the propellor is rotating, and even if the propellor is not moving, never touch it unless supervised by someone qualified.
WINCH CABLES
Be very careful around winch cables, as they may move unexpectedly. The winch driver can accidentally select the wrong cable to pull in. A cable can also catch another cable and cause several cables to move at the same time. Never stand in a cable loop and do not touch any of the cables if you are not the person hooking up the gliders.
1.2 LOOKING AFTER EACH OTHER
TEAM SPORT
Gliding is a team sport. You won’t be able to get into the air without help from others. Most people learn to fly at a club, or join a club shortly after they have learned to fly. People from all walks of life can enjoy gliding but only if every club member pays their annual fees on time and also takes part in jobs at the airfield, in the hanger, in the workshop or in the clubhouse. Of course you mainly become a club member because you want to fly gliders. But you will soon notice that other club members can also teach you new skills to keep the gliding club going. If you participate actively and ‘see’ what needs to be done, instead of waiting to be asked to do something, everything will run more smoothly, waiting times will be shorter and you will fly more often. And if you work hard to keep everything going, you will also get on well with your fellow aviators.

QUESTIONS
When you start gliding, a whole new world opens up to you. It is important to keep asking all the questions you have to get used to this new world. There is no such thing as a stupid question. Some things look easier than they are and there may be important things that you will easily overlook without proper instruction. If you are asked to perform a new task that you haven’t done before, ask someone to show you how to do it. For flight related questions you have to go to your instructor. For questions concerning the gliding operation you can speak to the duty pilot, launch marshal or whoever else is in charge at the launch point.

REPORTING - SPEAK-UP
We must all look after each other. If you see something that seems unsafe, even if you are not entirely sure, you have to speak up! All clubs have a process for reporting issues that could not be dealt with on the spot. Doing so should be strongly encouraged. If you have made or witnessed a mistake (and we all make mistakes) we can try to avoid these same mistakes in the future by reporting them and by learning lessons from them. In aviation, the goal is always to have a ‘just culture’. This means that incidents and accidents will not be punished unless they were caused by willful violation of the rules or gross negligence.
MEDICATION, ALCOHOL AND DRUGS
If a prescription drug influences your ability to drive, it will definitely influence your ability to fly. Always read the package leaflet for side effects and ask your doctor whether you are allowed to fly while using medica- tion. Recreational drugs and aviation most definitely do not mix; even several days after using them you can still experience negative and unexpected side effects.
Some glider pilots like to unwind after a day of flying by having a few drinks at the clubhouse. Please keep in mind that alcohol influences your sleep and that you should not drink more than two glasses if you are planning to fly the next day. Hangover effects can last for 48 hours and flying while under the influence of alcohol is very dangerous for yourself and others. The legal blood alcohol limit for doing anything directly related to aviation in the UK (even running a wing) is 20mg per 100ml, which is much lower than the legal limit for driving. You should avoid drinking any alcohol in the 12 hours before flying.
PERFORM AN I’M SAFE CHECKLIST BEFORE EVERY FLIGHT
| I Illness | Do not fly if you have a cold or feel generally unwell. |
| M Medicine | Do not fly if you are using medicine that may influence your flying and do not fly until at least 48 hours after anaesthesia (for instance, at the dentist’s). |
| S Stress | Listen to your body. Do not fly if you are stressed and not able to fully focus on the task at hand. Emotional events or arguments can cause a lot of stress. |
| A Alcohol | Do not fly when under the influence of alcohol. |
| F Fatigue | Do not fly if you are tired. Sleep first and come back later. |
| E Eating |
Do not fly if you are hungry or thirsty. Insufficient food intake can lead to serious incidents. Always take plenty of drinking water and food on longer flights. |
SUNGLASSES, WATER, SUNSCREEN
It’s important to look after yourself during a day of flying. Summer days can be long and hot and winter days bitter cold. When you are exposed to the sun you easily become dehydrated. The effects of dehydration can be very serious and lead to concentration loss and headaches. That is why you need to drink water - a lot of water!

Gliders are white, clouds are white and so are snowy mountaintops. White surfaces reflect a lot of sunlight and this can lead to temporary blindness while flying. Therefore you will need to get yourself a pair of good quality sunglasses with a UV (ultraviolet light) protective layer. We do not recommend buying polarised sunglasses as these make it hard to read the digital displays in your glider. A glider canopy does not protect you from exposure to UV radiation and this is why you will need to use sun cream as well as a hat. Avoid baseball caps because they restrict your vision and don’t protect your ears from the sun. Bucket hats are widely seen at gliding sites for good reason..
Think about when to close the canopy. If you close it too soon, the temperature can quickly become unbearable in the summer, and in the winter misting can become a problem.
1.3 THINGS THAT NEED DOING
INSTRUCTORS AND DUTY PILOT
One of the instructors on the airfield is usually in charge of the gliding operation that day. He or she is responsible for general management and safety. Other duties of the supervising instructor might include giving a weather and safety briefing before flying commences. During this briefing other tasks (for example flying the tug, operating the winch and taking on the role of Duty Pilot or Launch Marshal) are often assigned to other experienced pilots.

The Duty Pilot or Launch Marshal (LM) is responsible for the smooth running and safety at the launch point and all the movements of gliders and aircraft on the ground. The LM or Duty Pilot reports to the Instructor On Duty. The Duty Pilot usually also assigns students, instructors and other pilots. These tasks require a lot of energy and all initiatives to assist (offering help rather than waiting to be asked) the Duty Pilot are usually very much appreciated.

Place your hands at the thick leading edge of the wing as close to the fuselage (the part running from nose to tail) as possible. Another person should hold the wings level at one of the wing tips. This person can turn the glider by reducing or accelerating their walking speed. It’s important that only one wing is held at a time - having two people both trying to steer would obviously lead to confusion.
However, when manoeuvering close to obstacles there should be someone watching the other wing tip. If necessary, club members call My wing and Your wing to each other to coordinate switching between holding the two wings as the glider is manoeuvered.
![]()
Always avoid touching the canopy as it is vulnerable and very expensive to repair. Putting your hand on the canopy will also make the perspex dirty, resulting in reduced visibility when flying the glider.
PROTECT THE ELEVATOR
When some gliders are moved around on uneven ground, the control stick may need to be secured (perhaps with straps in the cockpit) in order to stop the elevator (the rear part of the tailplane) banging into the control stops and getting damaged.

DO NOT ‘TURN ON THE WHEEL’
A glider should only be rotated when it is moving forwards or backwards. If we turn the glider when it is not moving we may overload the mainwheel. If there is no removable tail dolly, someone needs to lower the glider’s nose, lifting the tail up, to avoid lateral forces on the tail.
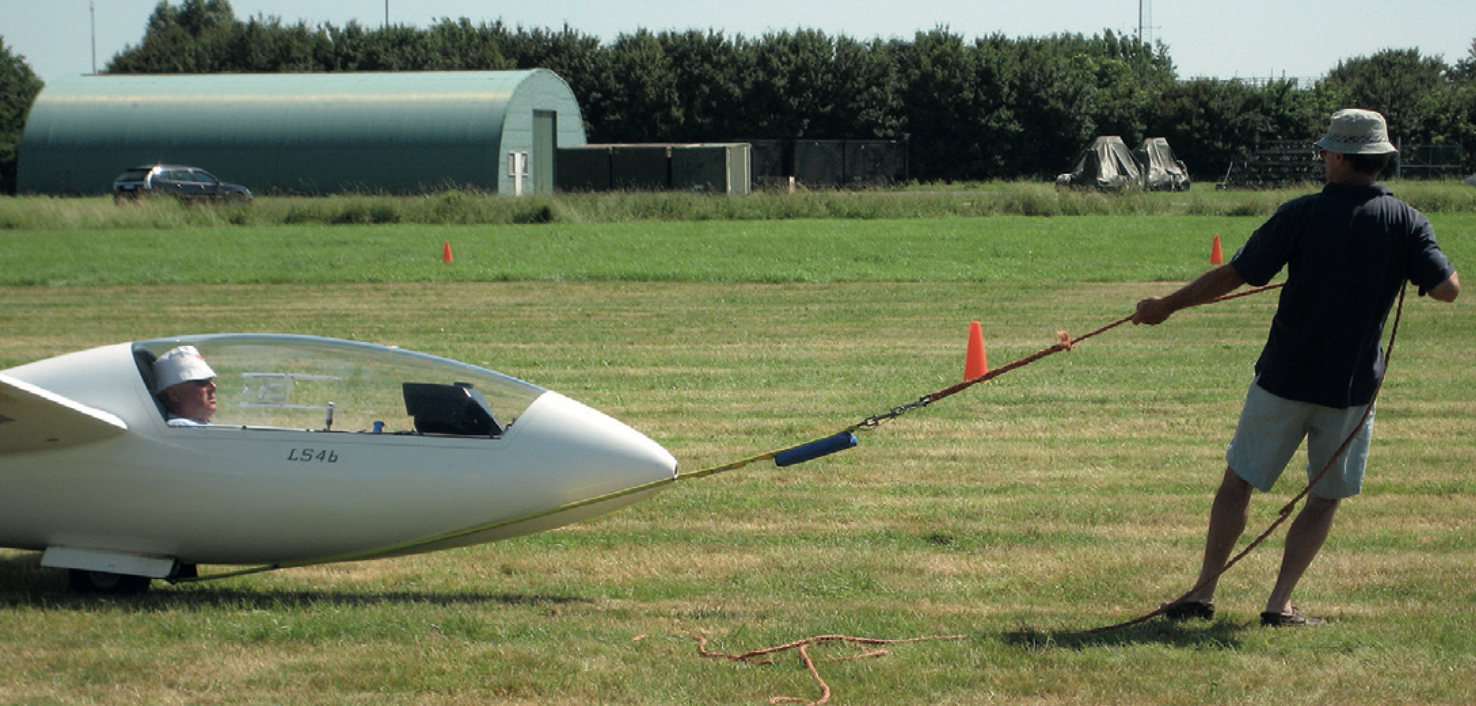
BEHIND A VEHICLE
When towing a glider behind a vehicle with a rope, two people should escort the glider. One holds a wing tip to steer and keep the wings level; the other walks at the glider’s nose in order to slow the glider down if the vehicle comes to a sudden stop or if the glider starts rolling down a slope. If a glider does not have a removable rotating transport wheel (tail dolly) the person at the nose also needs to lower the nose when turning to prevent the aircraft tail from scraping sideways on the ground.

The driver must be able to hear any calls: the radio must be off and a window should be open.
Many clubs and private owners use tow-out gear that do not require anybody at the glider’s nose or wing to hold the glider level during transportation. For example: wheels can be placed under a wing to keep them level and the tail dolly can be connected to a car’s towbar using a rod to pull the glider backwards. Be extremely careful when using any of these systems with obstacles and drive at normal walking speed. Always ensure that your canopy is closed and locked before you move the glider.
BACK AT THE LAUNCH POINT
The launch point is the place where we position the glider while keeping clear of other gliders and obstacles. Bear in mind that the wings may move up and down when the direction of the wind changes and do not place anything below a glider’s wing. To prevent the wings from dropping and the glider from rotating due to wind direction changes or strong thermals, always remove the tail dolly and place some weight on the wing tip.

Never walk away from the glider cockpit if the canopy is open; if you’re not working in the cockpit, close and lock the canopy. Strong winds may blow the canopy open (or closed) and damage it.
TO HOOK ON A GLIDER WHEN WINCH LAUNCHING
Perform this task only after another pilot has taught you how to do it. Caution: equipment and procedures can vary from place to place. The notes here are typical, but do be sure to follow your club’s local practices. An example launch cable assembly:
- Winch cable. Some clubs join these with a quick release hook
- Cable parachute & long strop
- Short strop
- Weak link assembly
- Rings

Do not touch any of the cables when the winch driver is winding in any of the other cables. These cables may be crossed or entangled with each other, and a moving cable can pick up a second cable. If the winch is equipped with an amber flashing warning light, then only touch the cables when the warning light is off. Pull aside any cable(s) not being used with this launch, so that they are not in front of any part of the launching glider. Pull the cable to be used so that the parachute is in front of the glider, and ensure that the cable and parachute are laid out on the ground, not tangled up in a heap.

Check that the weak link is correct for the glider.
Wait until the pilot asks for the cable to be hooked on. This is a big deal: the moment when the pilot announces that s/he is ready to launch. Do not hurry the pilot, or interrupt their pre-flight checks. The pilot has sole responsibility for ensuring that the glider is properly ready to fly, but some clubs require that members help with extra checks.

When the pilot asks for the cable, he or she will usually pull on the release knob at the same time, to open the cable hook. If for some reason they do not, prompt by saying the word Open. Look for the specific winch hook located closest to the centre of gravity of the glider, usually below the (rear) pilot’s seat and just in front of the main wheel. Some gliders have only a single hook. Keep the smallest of the two cable rings between two fingers to be able to connect it to the glider. Insert the small ring vertically up into the release mechanism. Say the word Close, at which point the pilot should progressively relax their pull on the release knob, closing the hook. The cable is now connected.
Check that the cable is connected properly to the glider by pulling firmly on the shock rope behind the weak link. Loudly announce Cable on, you have a black link (or whatever colour the link actually is).
Move promptly well off to one side, out of the way of the glider wing.
WEAK LINKS
The weak link is a small metal plate that is designed to break at a certain load. Weak links are colour-coded, with the colour indicating the breaking load. The weak link is placed between the cable parachute and the glider. This is a safety measure, to ensure that if for any reason the cable tension is greater than the glider is designed to withstand (perhaps because the glider flies through a strong updraft during the launch), then the weak link will break before the glider can sustain any damage. The required weak link colour may be painted on the side of the fuselage or be found on a list held by the launch marshal, but the ultimate authority is the glider’s Flight Manual, which should be consulted in case of doubt.
| Colour | Strength | Typical use |
| Green | 3 kN / 650 lbs | Aerotowing |
| White | 5 kN / 1100 lbs | Aerotowing, Winching old or very light gliders |
| Blue | 6 kN / 1350 lbs | Winching many single-seat gliders |
| Red | 7,5 kN / 1650 lbs | Winching some single-seat and two-seater gliders Winching some two-seater gliders |
| Brown | 8,5 kN / 1900 lbs | Winching some two-seater gliders |
| Black | 10 kN / 2250 lbs | Winching many two-seater gliders |
1 kN = 1000 Newton = 100 kgf (kilogram force) = 225 lbs
WING RUNNER
The person hooking the cable onto the glider is often the same person who supports the wing tip at the beginning of the launch (at some clubs it must be the same person).
By asking for the cable, the pilot has indicated that he or she is ready to launch, so you don’t need any further signal or permission to proceed. If for any reason the pilot changes his or her mind, s/he will reject the launch by pulling the cable release. If you become aware that the pilot has released the cable, stop the launch.
While supporting the tip, check that the area in front of the glider within 45 degrees either side of the runway line is clear, and that no pedestrians, vehicles or aircraft are about to cross the runway – either on the ground or in the air.
Check that the area behind the glider is clear, and that there are no aircraft on approach. It’s particularly important that you always do this, because the glider pilot cannot see in that direction.
Some clubs require the wing runner to be in charge of the launch, at others a launch marshal does this.

Move forward with the glider, supporting the wings level, until the glider is moving too quickly for you to keep up, at which point your support is pointless: let go. For a winch launch, you will only be able to take a few steps before the glider accelerates rapidly away, but for an aerotow you may have to walk and then run several metres; the acceleration provided by the tug is quite gentle.

STOPPING A LAUNCH
If anything looks wrong during the launch when the glider is on the ground, the launch should be stopped. Anyone can indicate the need to stop the launch if they see a problem. Do this by shouting STOP, STOP, STOP. Once the problem is resolved, it is easy to restart the launch procedure. The wing runner has a specific task during a winch take off run. Keeping the wing level is important.
If as a wing runner you are resisting an up or down force, that is wrong and the launch should be stopped. Note that some modern gliders with gracefully curved wings make judging wing level a little less intuitive, but looking from one wingtip across to the other can help.
Launch signalling is a safety critical task and signallers should be trained. Do not get involved until you gain the necessary experience and training.

TO HOOK ON BEFORE AN AEROTOW
The procedure for hooking on the cable for an aerotow is similar, but a specialised aerotow hook must be used. It is closer to the nose. (Again, some gliders have only a single hook). Whatever the launch, the correct hook must be used. Always ask if you’re unsure.
RETRIEVING THE WINCH CABLES
Driving the vehicle that brings the cables from winch to glider is a skilled and rewarding task. Please do offer to help as soon as you feel ready, but be aware that no one is allowed to perform this vital task on their own until fully trained.
When driving on an airfield, it is extremely important to keep an eye out for gliders coming in for landing. You cannot simply look up, because the car roof restricts your view considerably. If the winch is still running, approach it only from behind and remain in your vehicle or take shelter in the winch cabin. If a winch cable accidentally breaks it may bounce around and act like a chainsaw.

After connecting the cables onto the retrieve vehicle it is important to drive in a straight line from the winch to the launch point. If you don’t drive straight, the cables can get tangled up and it will take a long time untangling them.
FLIGHT LOG KEEPING AND WINCH SIGNALLING
Clubs and individual pilots need to know which pilots and gliders have been launched each flying day and how long they stayed in the air: a log must be kept. Sometimes this job is combined with signalling to the winch. Both are vital contributions to club operations: they need diligence. Just like with retrieve driving, please volunteer as soon as you feel ready. You will also not be allowed to do this alone until fully trained.
As signaller, it is important not to get distracted: watch both whoever is controlling the launch and the glider itself.

1.4 THE GLIDER AND THE FLIGHT CONTROLS
Below you see an illustration of a modern two-seater glider. The design of this aircraft is the result of over a century of innovation.
THE NOSE
The front end of the fuselage is called ‘the nose’ of the glider. The rear part of the fuselage is called ‘the tail’. Most training gliders have a release hook located near the nose to connect the rope for aerotow launches. Just in front of the main wheel you will find another release hook. This hook is positioned close to the glider’s centre of gravity and is sometimes referred to as a CG-hook. It is used for winch launches and also for automobile or bungee launching (which are now very uncommon, and we will not discuss them further). Pulling the yellow release knob in the cockpit opens both release hooks at the same time.

THE CANOPY
The canopy of a glider is very expensive. Dirty canopies need to be cleaned with a lot of water and a clean cloth. Using a dry or dirty cloth may cause scratches on the perspex; treat the canopy as you would an expensive pair of sunglasses. On the side of the canopy there is a small sliding window, sometimes called the Direct Vision (or DV) panel. The canopy is most vulnerable to cracking around the edges of the DV panel, so never hold the canopy here, and only reach through it to lock or unlock the canopy. Lift the canopy by using the appropriate handle.

THE WHEELS
Many two-seat training gliders have a nose wheel, a main wheel and a tail wheel (or tailskid). When you get into the cockpit and sit in the front seat, the glider will rotate on its nose wheel, lifting the tail. During a landing the main wheel and the tail wheel should touch the ground at the same time. After landing the glider will slowly tilt forwards onto its nose wheel.
THE WINGS
The wingspan of a modern two-seater glider can be over 18 metres / 60 feet. Inside the wings is a robust structure of spars and ribs; the wings are capable of carrying over 6 times the weight of the glider at maximum take-off weight. The wing spar runs from the wing tip into the fuselage where it is connected to the spar of the opposite wing. The leading edge of a wing is quite thick and strong; the trailing edge is much thinner. If you look at the cross section of a wing, you see that the top is rounder than the bottom.

THE ELEVATOR
The glider’s tail consists of a vertical and a horizontal part. The horizontal part is called the ‘tailplane’ or ‘horizontal stabilizer.’ The front of the tailplane is fixed to the fuselage, the rear part can be moved up and down, and is called the elevator. By pushing the control stick in the cockpit forward the elevator will move down; in flight this usually lifts the tail upwards, rotating the nose downwards and increasing the airspeed (unless the glider is being flown upside down!). On the other hand, moving the stick rearwards usually moves the nose up and decreases the airspeed (unless the glider is stalled, see next chapter).

THE AILERONS
By moving the control stick to one side you will notice the aileron on that side going up and the aileron on the opposite wing going down. Doing this in flight will result in one wing moving down and the other wing moving upwards: a rolling motion that we use for turning in that direction.

THE RUDDER
The vertical part of the tail is called the ‘fin’ or ‘vertical stabilizer.’ The front is fixed and the movable rear part is called the rudder. The rudder is connected to the rudder pedals in the cockpit. You can make ‘coordinated’ turns by using the rudder and ailerons together. Don’t worry too much about this now, you will learn more about coordinated turns in Lesson 4.8.
THE AIRBRAKES
The airbrakes are typically used to control the glider’s approach, so that the pilot can land precisely where desired. By pulling the airbrake lever rearwards, the airbrakes are opened on both wings simultaneously. This reduces the lift generated by the wing and increases the drag.

| 1 DV panel | 9 FLARM | 17 Cable releae (yellow) | |
| 2 Canopy locking lever | 10 Air vent control | 18 Rudder adjustment knob | |
| 3 Airbrakes lever (blue) | 11 Air speed indicator | 19 Radio | |
| 4 Trim lever (green) | 12 Vario | 20 Transponder | |
| 5 Control stick (with push-to-talk button) | 13 Altimeter | 21 Rudder pedals | |
| 6 Canopy jettison lever | 14 Compas | 22 Side pocket for documents | |
| 7 Microphone | 15 Slip indicator | ||
| 8 Yaw string | 16 Electronic master switch |
Cockpit iayouts may vary, the colours of levers and knobs are always identical.
1.5 BASIC FLIGHT INSTRUMENTS
The airspeed indicator (11) tells you the indicated airspeed in knots. Airspeed is different from ground speed, as displayed (for instance) by the speedometer in a car. When we are flying into the wind and the airspeed indicator is showing 42 kts, this 42 kts is the speed the glider has compared to the surrounding air. The ground speed would be lower in this case. When you are flying with tailwind, the ground speed is the sum of the indicated airspeed and the speed of the wind. The airspeed indicator (ASI) in the illustration shows coloured markings along with the numbers.

The colours are green, yellow and red:
- Green band – normal speed range; any one flight control can be moved rapidly all the way to its limit without damaging the glider.
- Yellow band – high speed range; do not use more than 1/3 control deflections. Avoid flying in the yellow speed range in turbulent air.
- Red line – maximum speed, never exceed this speed!
- Yellow triangle – the minimum recommended approach speed at maximum weight without water ballast.

The altimeter (13) is a barometer. The higher you get, the lower the pressure of the surrounding air. The altimeter shows height in feet (in gliders based in continental Europe, in metres). The adjustment knob is used to set the altimeter to zero (or airfield elevation) before take-off. The illustrated altimeter indicates 670 ft.

Variometers (12) show the rate at which the glider is gaining or losing energy as it climbs or descends. A variometer responds to changes in the pressure of the surrounding air, and is marked in knots (or metres per second in gliders based in continental Europe). 1 Knot is almost exactly 100 feet per minute. Both are indicating a climb of 2.5 knots. The left variometer is a mechanical type (not using any electronics) equipped with a McCready ring (see Lesson 4.26). The one on the right (not shown in the cockpit on page 18) is an electronic variometer that also produces an audio tone to indicate climb or sink

The compass (14) shows the direction your glider’s nose is pointing - called the ‘heading’ - in relation to the magnetic north pole. The compass may be subject to various errors when the glider is accelerating or turning.
- 360° or 000° is North
- 090° or E is East
- 180 ° or S is South
- 270° or W is West
This compass is showing 284°.

The yaw string (8) shows how the air is flowing over the outside of the glider. When the string is in the middle, as in the left diagram, the glider is being flown through the air with minimal air resistance and maximum efficiency. When the yaw string is displaced to one side (as in the right diagram), the glider is to some extent being flown sideways through the air. This increases the amount of drag generated as the air flows over the fuselage, reducing efficiency, and causing height to be lost more rapidly.

The slip indicator (15) also shows if the glider is flown straight or sideways through the air. Not all gliders are equipped with a slip indicator.

The radio (19) is used for communication with other aircraft or people on the ground. This radio is tuned to VHF Channel 129.980. The number below is another preselected channel that can be altered or made active by pressing the button with the arrows. On top of the control stick (5) there is a push-to-talk button to activate the microphone (7) and broadcast your voice over the radio.
![]()
The transponder (20) Some training gliders may be fitted with a transponder (17). This transmits a four-digit code together with your altitude and some unique identification information in a form that can be displayed on Air Traffic Control Radar screens.

FLARM (9) is an anti-collision warning device fitted to most gliders. It should always be turned on. The FLARM unit broadcasts your position to FLARM units in nearby aircraft, and simultaneously receives signals from other FLARM-equipped gliders nearby. If FLARM detects that your glider may come uncomfortably close to other aircraft in the next twenty seconds or so then it will give a visual and audio warning. However, FLARM is not infallible, and is not a substitute for good lookout (the lookout procedure is described in detail in Chapter 4.0). Even if you get a FLARM proximity warning, it’s better to look outside the glider to try to identify the threat, rather than focussing your attention on the FLARM display.
The other parts of the cockpit will be discussed later on (during Lesson 4.3). The instruments shown on these pages will look slightly different depending on the manufacturer, but they will indicate the same information. We will discuss modern flight computers in a later lesson, as they are not considered primary flight instruments and you will not need them during your basic training.
Also not shown is the landing gear lever that is used for main wheel or ‘undercarriage’ retraction and extension.
Many two-seater training gliders do not have a retractable landing gear and the systems may be very different. For instance in some modern gliders the gear is retracted by an electric motor and only requires the toggle of a single switch on your instrument panel.
1.6 A LITTLE BIT ABOUT THE WEATHER
You will be amazed how much there is to know about the weather. After a few seasons of glider flying your friends and family will come to you for the latest forecast.
Generally, we need to consider four factors: precipitation, wind, cloud base and horizontal visibility.
PRECIPITATION
On rainy days it is often not possible to fly. A single rain shower will not directly lead to all flights that day being cancelled, but thunderstorms will mean the operation has to be suspended. Thunderstorms pose a serious risk to glider flying. Not only is there the danger of lightning, thunderstorms may also cause strong winds that quickly shift in direction, accompanied by rain, ice, hail and snow.
Rain has a negative effect on the performance of gliders and also decrease horizontal visibility. Most modern gliders are perfectly capable of getting wet every now and then, but make sure you clear the wings of water droplets before you take off after a rain shower.

Mobile devices and the internet are great sources for retrieving aviation forecasts and technology is continually improving. Nowadays you can easily get live satellite images and weather warnings on your smartphone. Weather forecasts are getting more and more precise; all around the world you can have a pretty reliable forecast for the next 48 hours. Cross-country experts use various websites to calculate the distance they can fly on a good day. Some websites are free of charge, others require a subscription. Commercial and military airports employ weather specialists (or have computers perform the same tasks) and they can also provide you with weather observations and predictions.
WIND
Wind direction is specified as the direction the wind is coming FROM, so that (for instance) a ‘Northerly wind’ is one that is blowing FROM the north, TO the south. In forecasts and weather report the wind direction is given as a bearing on a 360° scale, rounded to the nearest ten degrees: North is 000°, East is 090°, South is 180° and West is 270°.

The windspeed is given in knots. For example 230/15 means that the wind is coming from the direction 230° which is Southwest and the average wind speed is 15 knots.
Gliders are normally launched and land into a headwind. Most airfields have pre-determined runways whose direction may oblige pilots to launch with a significant crosswind component, but nevertheless gliders are almost never launched if there is any significant amount of tailwind in the intended direction of launch.
CLOUD BASE
Cloud base is a confusing term. If you get up early in the morning and there is mist or fog with very limited visibility, the cloud base is zero. When the sun starts to heat up the earth this fog may disappear and later on form clouds. Sometimes there are several layers of clouds on top of each other. In aviation we separate these clouds in three categories: low, medium level and high. Thunderstorm clouds (also called cumulonimbus clouds) are the exception because they can occur at every level, from low to very high altitudes.